Mastering Figma Slides: A Hands-On Tutorial for Designers
Figma recently introduced a powerful new feature: Figma Slides.This functionality empowers UX and UI designers to create stunning and interactive slide decks directly within the Figma environment. It also makes Figma even more powerful and even more competitive compared to other graphic editors like Canva. In this tutorial, we will show you how to use Figma slides in general. And more specifically, we’ll dive into slide design, creating interactive slides, and presenting these slides … all in Figma!
What is Figma Slides?
If you're anything like us, you'll most likely already created your slides in Figma and then exported them to Powerpoint or Keynote. Well, these days are gone! Figma Slides is a presentation tool tailored for designers and their teams. It allows users to create dynamic and visually appealing slide decks without leaving the Figma ecosystem. Whether you're preparing for design reviews, startup pitches, or conference talks, Figma Slides provides the tools necessary to craft engaging interactive presentations.
Getting Started with Figma Slides
Getting started with Figma Slides is a simple three-step process:
- Open your Figma file browser. Look for the new icon that indicates the option to create a slide deck.
- Click on the "New Slide Deck" button. This action will take you to the template picker, where you can choose from a variety of professionally designed templates or start with a blank canvas.
- Browse through the available slide templates, which are categorised by themes such as light and dark slides. Select a template that fits your presentation's needs.
Here's a short gif detailing these initial steps:
Designing Your Slides
Now that you have your slide deck set-up, let’s dive into designing your slides with some practical steps:
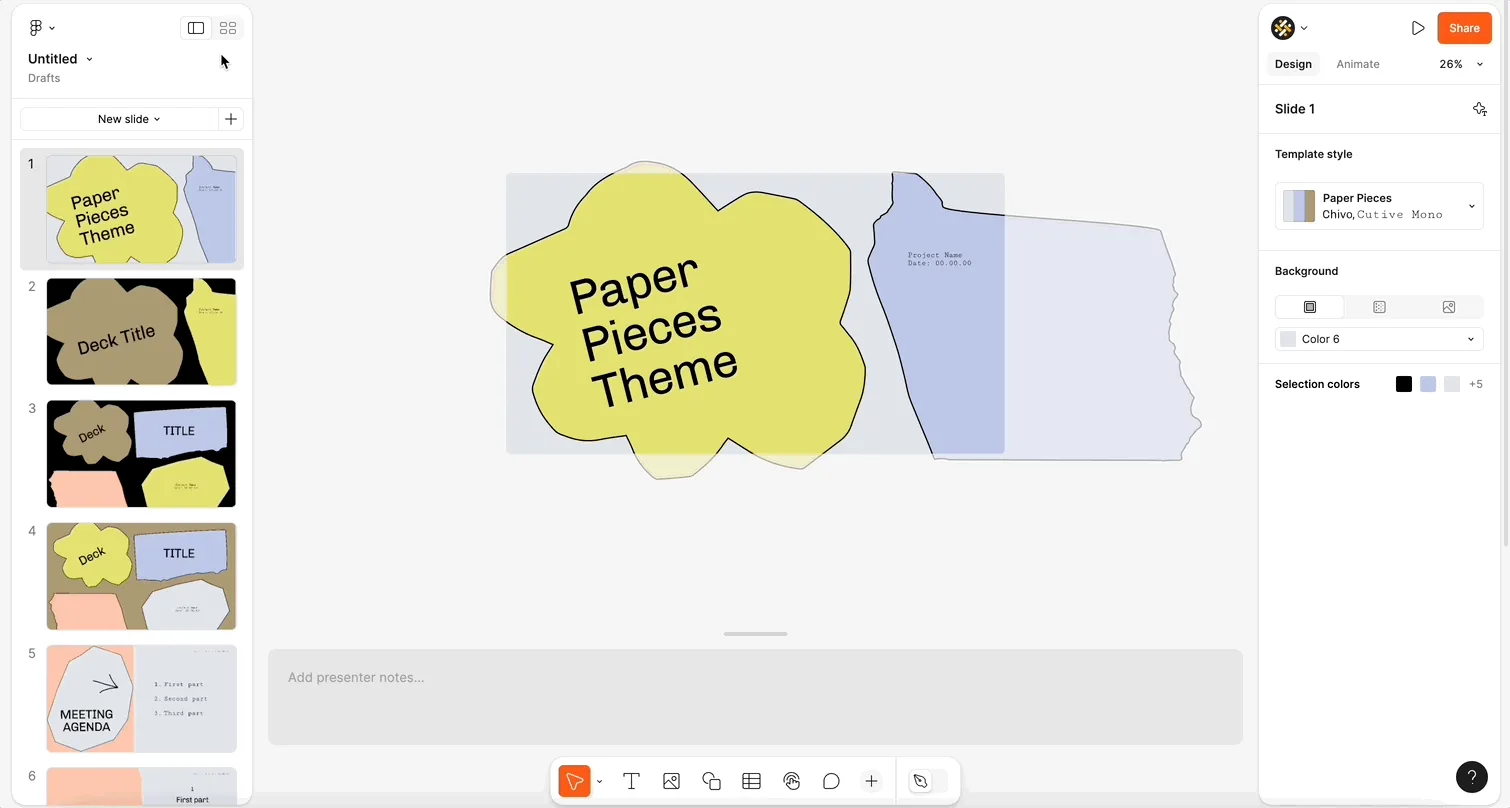
Switching Views
Figma offers you three views you can toggle between. Each view serves a particular purpose within your slide design process:
- The Slide View is best for editing of individual slides. This is most likely the view you'll be most familiar with from other tools such as Powerpoint or Google Slides.
- The Grid View provides an overview of your entire deck. This view is best to work on the flow of your presentation: slide ordering, structuring of sections within your slide deck, etc.
- The Design View gives you all the advanced design tooling you're used from Figma. By default Figma Slides provides a simplified set of design functionality: adding text or objects, changing colours, fonts and sizes, etc. Within the Design View you'll get to use auto-layout, see the layers of your slides, access advanced properties, etc.
Adding Content to your Slides

You can select from a variety of different tools in the bottom toolbar to add content to your slides. Here's an overview of what these tools offer you when it comes to slide design.
Move, Hand, Scale
The first tool allows you to switch between: Move, Hand tool and Scale. Move allows you to move selected objects in your slides, the Hand Tool allows you to pan across your slides while scale makes it easy to change sizing of selected elements.
Text, Media, Shapes and Tables
You add text using the Text Tool. Style your text by selecting it and using the properties panel to adjust the font, size, weight, and color. You can add media (e.g. images) by directly dragging and dropping them onto the slide canvas. Alternatively, you can press the Image tool button in the toolbar. Resize, crop, and apply effects to your images using the options in the right panel. Use the shape tools (rectangle, circle, line, etc.) to create custom graphics. Experiment with different colours and borders to enhance your slides. In contrast to "regular" Figma, its Slides product allows you to easily add tables with the Table tool. Simply click and drag to add a table to your slide. Once selected, you can add rows or columns to the table with the contextual buttons on the sides of the table.
Interactive Elements
One of the most impressive Figma Slides features is its built-in ability to add interactive elements to your presentation. More precisely, you're able to add four kinds of interactive elements to your slides. First, using Polls you can ask your audience for their opinion on a matter and see the results come in while you're presenting. By the way, for those who want more than just running polls, you can also build forms and surveys in Figma. The Weavely plugin turns your form designs into web forms without code, giving you a powerful way to collect detailed feedback and data.
Second, when you just want to see who in your audience has "done" something you can use the interactive Stamps element. Third, the Alignment element allows you to gauge an audience's sentiment on a particular topic using a Likert scale. Finally, you can add any Figma prototype to your slide using the Prototype interactive element. It is important to note that your audience will need to be signed in to their Figma account if you want them to interact with your presentation.
Miscellaneous
The Comment Tool allows you to leave comments and feedback for teammates, but we'll touch on Figma Slide's collaborative features later in this article. You can add elements from a Figma Design library to your slide by pressing the assets button (indicated by the "+" icon) at the end of the toolbar. And the toggle indicated with the drawing pen allows you to switch between Design Mode and Slides Mode. We discuss the difference between these in the previous section.
Using AI to Tailor your Slide's Content
Amongst all the innovation that Figma is bringing to designing and presenting slide decks, its "AI tone of voice" feature is by far our favourite. This simple tools allows you to select pieces of text or entire slides and change the tone of voice using an intuitive selector. In other words, depending on how you want your presentation to sound like (i.e. "Concise" versus "Expanded" and "Professional" versus "Casual") you simply drag the orange button along the appropriate scale. The gif below gives you a short overview of how that works in practice.
Collaborating with Your Team
As is the case for all Figma products, Figma Slides is designed and built with collaboration in mind. Here’s how you can work effectively with your team:
- Real-Time Collaboration: Invite team members to your slide deck by clicking on the "Share" button. They can join and edit the deck simultaneously, making it easy to brainstorm and refine ideas together
- Comments and Feedback: Encourage your team to leave comments directly on slides. Click on the comment icon in the top right corner to start a discussion about specific elements of your presentation.
- Cursor Chat: You can chat with teammates in real time by entering cursor chat mode. Enter this mode using the "/" keyboard shortcut and type your message. Exit the mode by pressing "Esc"
Presenting Your Slide Deck
When it comes to actually presenting your deck in Figma Slides there's a number of expected features. For example, you'll be able to add presenter notes, and select whether you want to see these while presenting. However, there are two noteworthy innovative features that Figma Slides brings to the table. First, by sharing the link to your Figma Slides presentation you'll be able to have your audience follow your presentation online. Second, using Figma's well-known "Spotlight" functionality you'll be able to switch between presenters. Gone are the days that you would need to ask for "next slide please" when there's multiple presenters!
Conclusion
Figma Slides is a game changer for designers looking to create visually appealing and interactive presentations. By following this hands-on tutorial, you can effectively use its features to enhance your presentation skills and engage your audience. Dive in and start experimenting with Figma Slides today! Happy presenting!
